Category: Beauty

  • Lash Extensions: Your Ultimate Guide to Stunning, Long-Lasting Lashes

    Lash Extensions: Your Ultimate Guide to Stunning, Long-Lasting Lashes

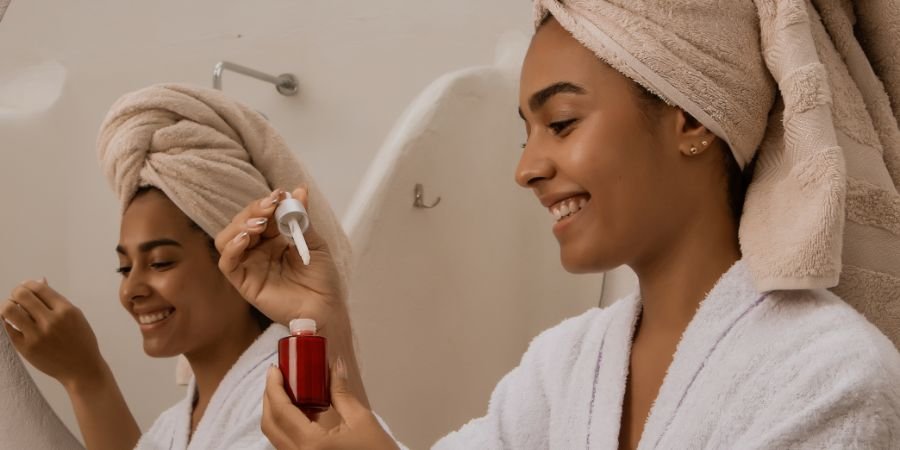
    Lash Extensions: The Secret to Effortless Glam

    Everyone loves that fluttery, eye-catching look that makes their eyes pop instantly. But achieving long, voluminous lashes without mascara or eyelash curlers? That’s where lash extensions come in. This beauty trend has taken the world by storm, offering convenience, glamour, and confidence—all in one treatment.

    Whether you’re a busy professional, a makeup enthusiast, or someone who wants to wake up looking fabulous, lash extensions can transform your daily routine. But there’s more to them than meets the eye. Understanding the types, application process, maintenance, and potential pitfalls can help you enjoy a flawless lash experience.

    What Are Lash Extensions?

    At their core, lash extensions are semi-permanent fibers applied individually to your natural lashes to enhance length, volume, and curl. Unlike strip lashes or magnetic lashes, these extensions are carefully bonded using a special adhesive for a natural yet dramatic look.

    The best part? They can last several weeks with proper care, eliminating the need for mascara, curlers, or fake lashes for special occasions.

    Types of lash extensions include:

    • Classic lashes: One extension per natural lash for a natural, subtle look.
    • Volume lashes: Multiple lightweight extensions per lash for a full, glamorous effect.
    • Hybrid lashes: A combination of classic and volume for texture and depth.
    • Mega volume lashes: Ultra-dense lashes for those who want a bold, dramatic appearance.

    Why Lash Extensions Have Become So Popular

    Lash extensions are more than just a beauty trend—they’re a lifestyle upgrade. Here’s why millions swear by them:

    1. Time-saving: Wake up with flawless lashes and save minutes on your makeup routine.
    2. Customizable: From natural to dramatic, extensions can match any desired look.
    3. Long-lasting: With proper care, extensions can last 4–6 weeks, making them a semi-permanent solution.
    4. Confidence boost: Fuller, longer lashes frame the eyes, enhancing facial features and self-esteem.

    Many celebrities and influencers have also contributed to their popularity, making them a staple in modern beauty routines.

    How Lash Extensions Are Applied

    Understanding the application process can ease any nervousness about getting lash extensions. Here’s a step-by-step overview:

    1. Consultation: Your technician will assess your natural lashes, desired look, and any sensitivities.
    2. Preparation: The eye area is cleaned and taped to protect your skin.
    3. Application: Using tweezers, individual extensions are dipped in adhesive and applied to each natural lash.
    4. Drying & Setting: Adhesive bonds are left to set for several minutes, ensuring durability.
    5. Final Touch: Lashes are brushed and checked for uniformity.

    Tip: Always choose a certified lash artist to ensure safety and the best results. Poor application can cause irritation, infection, or even lash loss.

    Lash Extensions Maintenance Tips

    Maintaining lash extensions is crucial for their longevity and keeping your eyes healthy. Here are some practical tips:

    • Avoid water & steam for the first 24–48 hours: This helps the adhesive set properly.
    • Skip oil-based products: Oil can weaken the bond and cause premature shedding.
    • Brush daily: Use a clean spoolie brush to keep lashes separated and neat.
    • Gentle cleansing: Use a lash-safe cleanser to remove dirt and makeup without tugging.
    • Regular fills: Schedule touch-ups every 2–3 weeks to maintain volume and shape.

    Proper aftercare ensures that your lash extensions remain lush, natural-looking, and damage-free.

    Lash Extensions Styles: Choosing the Right Look

    One of the best things about lash extensions is the ability to customize your look. Different styles suit different eye shapes and personalities:

    Natural Everyday Look

    Classic lashes provide subtle enhancement, perfect for work, school, or minimal makeup days.

    Glamorous Evening Look

    Volume or hybrid lashes create a dramatic, full-bodied effect, ideal for weddings, parties, or photoshoots.

    Bold & Fashion-Forward

    Mega volume lashes make a statement, giving a full-on glamorous or editorial vibe.

    Pro Tip: Your lash artist can tailor curl, length, and thickness based on your eye shape for the most flattering result. For example, a slight curl can lift droopy eyes, while longer outer lashes create a cat-eye effect.

    Lash Extensions vs. Strip Lashes: Which Is Better?

    Many wonder whether lash extensions are worth it compared to traditional strip lashes. Here’s a quick comparison:

    FeatureLash ExtensionsStrip Lashes
    Longevity4–6 weeksSingle-use
    ComfortLightweight, semi-permanentCan feel heavy or sticky
    MaintenanceFill-ins requiredNo upkeep after removal
    Natural LookVery natural when done professionallyCan look obvious
    CostHigher upfrontLower upfront but recurring purchase

    If convenience, natural beauty, and long-term results matter, lash extensions are the superior choice.

    Common Myths About Lash Extensions

    Despite their popularity, lash extensions still face misconceptions. Let’s debunk a few:

    1. Myth: They ruin natural lashes.
      Truth: When applied by a professional and maintained correctly, lash extensions do not damage your natural lashes.
    2. Myth: You can’t wear mascara.
      Truth: Water-based mascara designed for extensions is safe, though often unnecessary due to the fullness of lashes.
    3. Myth: They last forever.
      Truth: Extensions shed naturally as your own lashes grow. Regular fills are needed for a consistent look.
    4. Myth: Only celebrities can pull them off.
      Truth: Lash extensions suit all eye shapes, ages, and lifestyles.

    Understanding the facts ensures realistic expectations and a better overall experience.

    Health & Safety Tips for Lash Extensions

    Eye health should never be compromised for beauty. Here’s how to keep your lash extensions safe:

    • Always choose certified, experienced technicians.
    • Avoid DIY kits if possible—they can cause allergic reactions or eye infections.
    • Do not rub your eyes or pull on extensions.
    • Keep eyelash glue away from the skin and eyes.

    Tip: If you experience redness, irritation, or swelling, remove the extensions and consult a professional.

    How to Remove Lash Extensions Safely

    Extensions should never be forcibly pulled off. Professional removal ensures your natural lashes remain healthy. Options include:

    • Professional removal: Your lash technician uses a special solvent to dissolve the adhesive safely.
    • At-home removal (if necessary): Use an oil-based cleanser and patience, but be aware this method is slower and riskier.

    Avoid tugging or peeling, as it can cause permanent lash loss.

    Lash Extensions and Makeup

    One of the greatest advantages of lash extensions is reducing your dependency on eye makeup. Here’s how to adjust your routine:

    • Skip heavy mascara; extensions already provide volume.
    • Use powder-based eyeshadows rather than creamy formulas to prevent adhesive weakening.
    • Opt for gentle eyeliners; gel liners near the lash line may interfere with extensions.
    • Minimalist makeup looks now become effortless with long, fluttery lashes.

    Cost of Lash Extensions

    Pricing varies based on location, style, and technician expertise. On average:

    • Classic lashes: $80–$150
    • Volume lashes: $120–$200
    • Mega volume lashes: $200–$350

    Remember, higher prices often reflect better quality, safer adhesives, and more experienced technicians. Consider it an investment in your beauty and confidence.

    DIY Lash Extensions: Are They Worth It?

    While DIY kits are available, they come with risks. Professional application guarantees:

    • Proper adhesive use
    • Correct lash placement and weight distribution
    • Long-lasting results
    • Reduced chance of irritation or infection

    If you love convenience, professional application is strongly recommended.

    Top Tips for Long-Lasting Lash Extensions

    1. Sleep on your back to avoid pressure on lashes.
    2. Avoid waterproof mascara—it’s hard to remove and can damage extensions.
    3. Use a silk or satin pillowcase to reduce friction.
    4. Schedule regular fills to maintain fullness.
    5. Avoid rubbing or pulling on lashes.

    Following these tips helps your lashes look fresh and beautiful for weeks.

    FAQs About Lash Extensions

    Q1: How long do lash extensions last?
    A: With proper care, lash extensions last 4–6 weeks. Regular fills every 2–3 weeks are recommended to maintain fullness.

    Q2: Can I wear mascara with lash extensions?
    A: Water-based mascara designed for extensions is safe, but often unnecessary due to the natural fullness of lash extensions.

    Q3: Do lash extensions damage natural lashes?
    A: No, when applied by a certified professional and properly maintained, extensions do not damage your natural lashes.

    Q4: How can I remove lash extensions safely at home?
    A: Use an oil-based cleanser gently, but professional removal is safest to prevent lash damage or irritation.

    Conclusion: Why Lash Extensions Are a Beauty Game-Changer

    Lash extensions are more than a beauty trend—they’re a lifestyle upgrade that saves time, boosts confidence, and enhances natural beauty. With proper application, maintenance, and care, they offer effortless glam that can last weeks.

    Whether you want a subtle enhancement or a full-on dramatic look, lash extensions can be tailored to suit your personality, lifestyle, and eye shape. By debunking myths, understanding safety tips, and investing in a professional, you can enjoy lush, fluttery lashes without compromise.

    Ready to transform your eyes and simplify your beauty routine? Lash extensions might just be the perfect solution for you.

  • Retinol Serum: The Ultimate Guide to Glowing, Youthful Skin

    Retinol Serum: The Ultimate Guide to Glowing, Youthful Skin

    Everyone wants smooth, radiant skin that turns heads—but achieving it isn’t always simple. If you’ve been struggling with dullness, fine lines, or stubborn acne, a Retinol serum might be your skincare game-changer. Widely regarded as one of the most effective anti-aging and skin-renewing solutions, this powerhouse serum can make a visible difference when used correctly.

    In this guide, we’ll dive deep into what Retinol serum is, how it works, the benefits, practical tips for use, and common questions answered. Whether you’re a skincare newbie or a beauty enthusiast, this article will help you unlock your skin’s full potential.

    What is Retinol Serum?

    A Retinol serum is a skincare product containing retinol, a derivative of vitamin A. Retinol works at the cellular level, promoting faster skin turnover and stimulating collagen production. This means it helps fade fine lines, wrinkles, acne scars, and dark spots, leaving your skin smoother and more youthful.

    Unlike creams or oils, serums have a lightweight, fast-absorbing formula, making them highly effective. Their concentrated nature ensures that active ingredients penetrate deeper into the skin, delivering noticeable results.

    How Retinol Serum Works

    Retinol serum works by increasing the rate at which skin cells renew themselves. Over time, dead skin cells shed faster, while new, healthy cells surface. This process reduces the appearance of wrinkles, smooths texture, and brightens your complexion.

    Additionally, retinol helps unclog pores, making it an excellent choice for those prone to acne or blackheads. By boosting collagen and elastin production, it also improves skin elasticity, preventing sagging and fine lines.

    Benefits of Using Retinol Serum

    Using a Retinol serum consistently can transform your skincare routine. Here are the key benefits:

    1. Reduces Fine Lines and Wrinkles

    Retinol stimulates collagen production, which plumps the skin and smooths out lines. Regular use can visibly reduce crow’s feet, forehead lines, and laugh lines.

    2. Fights Acne and Blemishes

    Retinol unclogs pores and reduces inflammation, making it ideal for acne-prone skin. It helps prevent new breakouts and diminishes post-acne scars.

    3. Evens Skin Tone

    Dark spots, sun damage, and hyperpigmentation can fade over time with retinol. A consistent routine can result in a more even, radiant complexion.

    4. Enhances Skin Texture

    Retinol serum promotes exfoliation at a cellular level. The result? Smoother, softer skin that feels rejuvenated.

    5. Boosts Radiance

    By removing dead skin cells and stimulating new ones, retinol serum helps your skin glow naturally, giving a youthful, fresh appearance.

    Choosing the Right Retinol Serum

    Not all Retinol serums are created equal. Selecting the right product for your skin type and concerns is crucial.

    Consider Retinol Strength

    • 0.1% – 0.3%: Ideal for beginners, sensitive skin, or those new to retinol.
    • 0.5% – 1%: Suitable for regular users or those targeting noticeable wrinkles and dark spots.
    • Above 1%: For experienced users; consult a dermatologist before using.

    Check for Complementary Ingredients

    Look for serums containing soothing agents like hyaluronic acid, niacinamide, or ceramides. These reduce irritation and enhance hydration.

    Packaging Matters

    Retinol is sensitive to light and air. Choose products in dark or opaque bottles with airtight pumps to maintain potency.

    How to Incorporate Retinol Serum Into Your Routine

    Using Retinol serum correctly is essential to prevent irritation and achieve results. Here’s a step-by-step guide:

    Step 1: Start Slowly

    Begin with 1–2 nights per week, gradually increasing frequency as your skin builds tolerance.

    Step 2: Apply on Clean, Dry Skin

    After cleansing and toning, apply a pea-sized amount evenly across your face. Avoid the eye area unless the serum is formulated for sensitive areas.

    Step 3: Moisturize

    Follow with a gentle moisturizer to prevent dryness or peeling, common side effects in the first few weeks.

    Step 4: Use Sunscreen During the Day

    Retinol increases sun sensitivity. Apply broad-spectrum SPF 30+ daily to protect your skin.

    Tips for Beginners

    1. Patch Test First: Apply a small amount on your wrist or jawline to check for reactions.
    2. Avoid Mixing Harsh Actives: Skip combining with AHAs/BHAs or vitamin C at night to reduce irritation.
    3. Be Patient: Visible results can take 8–12 weeks. Consistency is key.
    4. Hydration is Essential: Use hydrating serums or creams to minimize dryness.

    Retinol Serum for Different Skin Types

    Dry Skin: Look for retinol serums with hydrating ingredients like glycerin, squalane, or hyaluronic acid.

    Oily Skin: Lightweight, oil-free formulations help reduce breakouts without clogging pores.

    Sensitive Skin: Start with low-strength retinol (0.1–0.3%) and use every 3–4 nights. Incorporate calming ingredients like aloe vera or chamomile.

    Combination Skin: Focus on areas with concern—wrinkles or dark spots—and adjust frequency based on tolerance.

    Common Mistakes to Avoid

    • Using retinol too often or in high concentrations early on
    • Skipping sunscreen during the day
    • Applying retinol on wet skin
    • Mixing with harsh exfoliants or acids

    By avoiding these mistakes, you ensure maximum benefits without irritation.

    Combining Retinol Serum With Other Skincare Products

    A well-rounded skincare routine can enhance retinol’s effectiveness:

    • Cleanser: Gentle, non-stripping cleansers prepare your skin.
    • Toner: Hydrating toners balance pH and calm skin.
    • Moisturizer: Locks in hydration and reduces dryness.
    • Serums: Hyaluronic acid or peptides complement retinol for extra hydration and skin repair.
    • Sunscreen: Daytime SPF protects from UV damage.

    Retinol Serum vs. Retinoids

    While “retinol” is a common term, it’s part of a broader family called retinoids:

    • Retinol: Mild, over-the-counter option for anti-aging and acne.
    • Retinaldehyde: Slightly stronger, works faster but may irritate sensitive skin.
    • Tretinoin (Retinoic Acid): Prescription-only, highly potent for severe aging or acne.

    Choosing the right product depends on your skin goals, tolerance, and dermatologist guidance.

    Real-Life Examples

    • Anna, 32, working professional: After 3 months of nightly retinol serum, noticed fine lines around her eyes softened, and her skin texture improved.
    • Raj, 28, acne-prone skin: Used a retinol serum twice a week. Within 8 weeks, his breakouts reduced significantly, and acne scars started fading.

    These examples show how versatile Retinol serum can be, whether your goal is anti-aging, acne control, or brightening.

    FAQ About Retinol Serum

    Q1: Can I use retinol serum during pregnancy?
    A: No, retinol is not recommended during pregnancy or breastfeeding. Consult a doctor for safe alternatives like bakuchiol.

    Q2: How long does it take to see results?
    A: Most users notice improvements in skin texture and brightness within 8–12 weeks. Anti-aging effects may take longer.

    Q3: Can I use retinol serum in the morning?
    A: It’s best used at night. Retinol increases sun sensitivity, so daytime use without SPF can cause damage.

    Q4: Is retinol serum suitable for sensitive skin?
    A: Yes, with low-strength formulations and gradual introduction. Pairing with moisturizers and avoiding harsh products helps reduce irritation.

    Conclusion

    A Retinol serum is a must-have for anyone serious about skincare. Its proven ability to reduce wrinkles, fade dark spots, improve texture, and promote youthful radiance makes it a true powerhouse.

    Starting slow, choosing the right concentration, and protecting your skin with hydration and sunscreen ensures maximum benefits without irritation. Whether your concern is aging, acne, or dullness, incorporating a retinol serum into your nighttime routine can revolutionize your skin.

    Consistency, patience, and a smart routine are the keys to glowing, healthy skin. Begin today and let your skin reveal its full potential with the transformative power of a Retinol serum.

  • Master the Korean Skincare Routine: Your Ultimate Guide to Glowing Skin

    Master the Korean Skincare Routine: Your Ultimate Guide to Glowing Skin

    Have you ever wondered why Korean women seem to have flawless, glowing skin? The secret isn’t magic—it’s the Korean skincare routine. Known for its multi-step approach and focus on hydration, protection, and prevention, this routine has taken the beauty world by storm.

    Unlike quick fixes that promise overnight miracles, Korean skincare emphasizes consistency, gentle care, and nourishing ingredients. It’s about building a habit that not only improves the skin’s appearance but also its overall health. Whether you’re dealing with dryness, acne, pigmentation, or dullness, adopting a Korean skincare routine can revolutionize your daily regimen.

    In this guide, we’ll break down every step, share tips, highlight popular products, and answer common questions—so you can confidently start your journey to radiant, healthy skin.

    What Is a Korean Skincare Routine?

    A Korean skincare routine is a comprehensive, multi-step approach to caring for your skin. Unlike typical skincare regimens that focus on treating problems, Korean skincare emphasizes prevention, hydration, and maintaining long-term skin health.

    The key idea is layering: light, hydrating products are applied first, followed by richer creams to seal in moisture. Each step has a purpose, whether it’s cleansing, nourishing, or protecting the skin. This method helps address multiple skin concerns at once—like dryness, fine lines, and uneven tone—without being harsh.

    Why Korean Skincare Works

    There are several reasons why the Korean skincare routine is so effective:

    1. Layering Products: Applying products in the correct order ensures better absorption and maximum benefits.
    2. Hydration is Key: Korean skincare prioritizes keeping skin hydrated rather than relying on harsh treatments.
    3. High-Quality Ingredients: Ingredients like hyaluronic acid, ceramides, antioxidants, and botanical extracts nourish and protect the skin.
    4. Sun Protection: Daily SPF prevents premature aging and protects skin from harmful UV rays.
    5. Consistency: Unlike occasional treatments, the Korean approach emphasizes daily care, which leads to long-lasting results.

    The combination of these factors ensures skin looks radiant, smooth, and healthy over time.

    The 10-Step Korean Skincare Routine: Step by Step

    While not everyone follows all ten steps every day, the classic 10-step routine is the most thorough. Here’s a breakdown:

    1. Oil-Based Cleanser

    The first step removes makeup, sunscreen, and impurities. Use a gentle oil, such as camellia, jojoba, or mineral oil. Massage onto dry skin and rinse with lukewarm water.

    Tip: Double cleansing is essential. The oil cleanser removes surface debris, preparing your skin for deeper cleansing.

    2. Water-Based Cleanser

    Follow with a mild, water-based cleanser to remove sweat, dirt, and residual oil. Look for foaming or gel cleansers with soothing ingredients like green tea, aloe vera, or chamomile.

    Practical Tip: For sensitive skin, avoid harsh sulfates that can strip natural oils.

    3. Exfoliation (2–3 Times per Week)

    Exfoliation removes dead skin cells and promotes cell turnover. Korean skincare favors gentle chemical exfoliants like AHA (glycolic acid) or BHA (salicylic acid) instead of harsh physical scrubs.

    Warning: Over-exfoliating can cause irritation and sensitivity. Stick to 2–3 times per week.

    4. Toner

    Toners balance your skin’s pH and prep it for the next layers. Choose hydrating toners with hyaluronic acid, niacinamide, or centella asiatica for soothing benefits.

    Tip: Apply toner with a cotton pad or pat it in with your hands for better absorption.

    5. Essence

    Essence is considered the “heart” of Korean skincare. It’s lightweight but packed with active ingredients that hydrate, improve elasticity, and help other products penetrate more effectively.

    Example: Missha Time Revolution The First Treatment Essence is a cult favorite for hydration and brightening.

    6. Serum or Ampoule

    Serums target specific concerns such as pigmentation, fine lines, acne, or dullness. Common ingredients include vitamin C, peptides, or snail mucin, known for their healing and regenerative properties.

    Tip: Gently pat the serum onto your face instead of rubbing it. This helps absorption and minimizes irritation.

    7. Sheet Mask (Optional, 2–3 Times per Week)

    Sheet masks provide an extra boost of hydration and nutrients. Choose masks based on your skin concern: brightening, anti-aging, calming, or hydrating.

    Practical Tip: Use sheet masks in the evening as a relaxing skincare ritual. Leave on for 15–20 minutes and gently pat remaining essence into the skin.

    8. Eye Cream

    The delicate eye area requires special care. Korean eye creams target dark circles, puffiness, and fine lines. Use your ring finger to gently tap the product around your eyes for optimal absorption.

    9. Moisturizer

    Moisturizers lock in all the layers applied before. For oily skin, gel-based creams are ideal, while dry skin benefits from richer, creamier formulas.

    Example: Laneige Water Bank Gel Cream for hydration without heaviness, or Etude House SoonJung Cream for sensitive, dry skin.

    10. Sunscreen (Morning Only)

    SPF protects your skin from premature aging, hyperpigmentation, and damage caused by UV rays. Apply generously every morning, even on cloudy days.

    Tip: Reapply sunscreen every 2–3 hours if exposed to sunlight for extended periods.

    Adapting the Korean Skincare Routine for Different Skin Types

    The beauty of the Korean skincare routine is that it’s highly customizable.

    • Oily Skin: Focus on water-based cleansers, gel moisturizers, and lightweight serums. Avoid heavy creams.
    • Dry Skin: Prioritize richer creams, nourishing oils, and hydrating essences to lock in moisture.
    • Sensitive Skin: Stick to fragrance-free products, avoid harsh exfoliants, and patch test new products.
    • Combination Skin: Use lighter products on oily areas and richer products on dry zones.

    Tip: Observe your skin’s reaction and adjust layers or product types accordingly.

    Common Mistakes to Avoid in Korean Skincare

    Even the best routines can backfire if done incorrectly. Common mistakes include:

    • Skipping Sunscreen: UV damage can reverse all your efforts.
    • Over-Exfoliating: Too many chemical or physical exfoliants can irritate skin.
    • Using Too Many Actives at Once: Combining retinol, vitamin C, and acids without care can cause redness and dryness.
    • Ignoring Lifestyle Factors: Sleep, hydration, and nutrition impact skin health significantly.

    Avoiding these errors ensures you see the full benefits of the Korean skincare routine.

    The Best Products for a Korean Skincare Routine

    Here are some widely recommended products suitable for most skin types:

    • Cleansers: Banila Co Clean It Zero, Innisfree Green Tea Foam Cleanser
    • Essence: Missha Time Revolution, Cosrx Galactomyces
    • Serums: Klairs Freshly Juiced Vitamin C, Benton Snail Bee Serum
    • Sheet Masks: Mediheal N.M.F, Leaders Insolution
    • Moisturizers: Laneige Water Bank Gel Cream, Etude House SoonJung Cream
    • Sunscreen: Missha All Around Safe Block, Etude House Sunprise

    Pro Tip: Don’t overload your skin with too many products at once. Start with essentials and gradually incorporate others.

    Tips to Make the Korean Skincare Routine Work for You

    1. Start Simple: Begin with cleansing, toner, and moisturizer. Gradually add layers like serums and essences.
    2. Be Consistent: Daily care is more effective than occasional intensive routines.
    3. Hydrate from Within: Drinking water and eating nutrient-rich foods complement your skincare efforts.
    4. Listen to Your Skin: Adjust frequency and products based on how your skin reacts.
    5. Pat, Don’t Rub: Gentle patting improves absorption and reduces irritation.

    FAQ: Korean Skincare Routine

    Q1: How long does it take to see results from a Korean skincare routine?
    A: Many notice improvements in hydration and smoothness within 2–4 weeks. Significant changes in brightness, acne, or fine lines may take 2–3 months.

    Q2: Do I need to follow all 10 steps every day?
    A: No. A simplified routine with cleansing, toner, moisturizer, and sunscreen is sufficient for beginners. Add serums, essences, and masks gradually.

    Q3: Can men follow a Korean skincare routine?
    A: Absolutely. The routine focuses on healthy skin and is suitable for all genders.

    Q4: Are Korean skincare products safe for sensitive skin?
    A: Many products are gentle, but check for irritants like alcohol or fragrance. Always patch test before full use.

    Conclusion: Your Journey to Glowing Skin

    The Korean skincare routine isn’t just a beauty trend—it’s a commitment to healthy, radiant skin. By layering hydrating, nourishing, and protective products consistently, anyone can achieve smoother, brighter, and more resilient skin.

    Start with the basics, gradually add steps, and choose products that suit your skin type. With patience, dedication, and the right guidance, glowing, youthful skin isn’t just a dream—it becomes your everyday reality.

    Adopt the Korean skincare routine, and let your skin reflect the care, consistency, and love you invest in it every day.

  • Laser Treatment for Acne Scars 2026: The Ultimate Guide to Clear, Smooth Skin

    Laser Treatment for Acne Scars 2026: The Ultimate Guide to Clear, Smooth Skin

    Acne scars are more than just a cosmetic concern—they can affect confidence, social life, and even professional presence. If you’ve tried creams, peels, and home remedies with limited results, laser treatment for acne scars might be the game-changer you need. This advanced dermatological procedure not only improves the appearance of scars but also boosts skin texture and stimulates natural healing.

    In this guide, we’ll dive deep into how laser treatment works, its benefits, types, what to expect, and tips for maximizing results. By the end, you’ll know whether this treatment is right for your skin journey.

    What Is Laser Treatment for Acne Scars?

    Laser treatment for acne scars is a non-invasive procedure that uses focused light energy to target damaged skin layers. By removing scar tissue and stimulating collagen production, lasers help your skin heal and regenerate naturally.

    Unlike topical treatments, which only address surface-level imperfections, laser therapy works from within. This makes it especially effective for moderate to severe acne scars, including ice-pick scars, rolling scars, and boxcar scars.

    How Does Laser Treatment Work?

    Laser treatment for acne scars works by emitting controlled beams of light into the skin. The type of laser used depends on your skin type, scar severity, and desired outcome. Here’s a simplified breakdown:

    1. Fractional Lasers: These lasers treat a fraction of the skin at a time, creating tiny wounds that trigger healing while leaving surrounding skin untouched.
    2. Ablative Lasers: These remove the top layer of skin, helping deep scars heal more effectively.
    3. Non-Ablative Lasers: These work below the skin surface, stimulating collagen without removing skin layers, ideal for milder scars.

    Most treatments are performed by dermatologists in a clinic or medical spa setting. Sessions typically last 20–60 minutes depending on the area treated.

    Benefits of Laser Treatment for Acne Scars

    Choosing laser treatment for acne scars comes with a range of benefits:

    • Improved Skin Texture: Laser therapy smooths uneven skin, reducing the appearance of deep pits and ridges.
    • Stimulates Collagen Production: Collagen is essential for skin elasticity, making scars less visible over time.
    • Quick Recovery: Compared to surgical options, laser treatments require minimal downtime.
    • Long-Lasting Results: With proper care, improvements can last years, making it a worthwhile investment.

    Many patients report visible improvement after just one session, though multiple sessions may be needed for optimal results.

    Types of Acne Scars That Laser Treatment Can Treat

    Not all scars are the same, and knowing your scar type can help determine the most effective laser treatment:

    • Ice-Pick Scars: Deep, narrow scars that look like tiny holes. Fractional or ablative lasers work best.
    • Boxcar Scars: Broad, rectangular indentations; responsive to ablative and fractional laser therapy.
    • Rolling Scars: Wave-like depressions; fractional lasers help smooth the skin.
    • Hypertrophic Scars: Raised scars caused by excess collagen; certain non-ablative lasers can reduce thickness.

    Understanding your scar type allows dermatologists to customize a treatment plan tailored to your skin.

    Preparing for Laser Treatment: Tips for Best Results

    Preparation is key to ensuring the best results from laser treatment for acne scars:

    • Consult a Dermatologist: Discuss your skin type, scar severity, and medical history to choose the right laser.
    • Avoid Sun Exposure: Sunburned skin is more prone to complications; always use SPF beforehand.
    • Stop Certain Medications: Some acne medications, like isotretinoin, may need to be paused before treatment.
    • Follow Skincare Guidelines: Gentle cleansing and hydration before treatment improve outcomes.

    Proper preparation not only enhances effectiveness but also reduces risks like hyperpigmentation or irritation.

    What to Expect During and After Treatment

    Most laser sessions are quick, with minimal discomfort. Some patients feel a mild stinging sensation or heat during the procedure. A cooling device or numbing cream is often used to enhance comfort.

    After treatment:

    • Skin may be red or slightly swollen for 2–3 days.
    • Peeling or flaking is normal as damaged skin sheds.
    • Avoid direct sun exposure and follow dermatologist’s aftercare instructions.

    Results gradually appear over weeks as collagen rebuilds and scars soften. Multiple sessions spaced a few weeks apart often yield the best improvement.

    Practical Tips for Maintaining Results

    Laser treatment is effective, but combining it with smart skincare maximizes benefits:

    • Hydrate and Moisturize: Healthy skin heals faster.
    • Use Sunscreen Daily: UV rays can darken scars and slow recovery.
    • Avoid Picking at Skin: Scabs or peeling skin should heal naturally.
    • Follow Up Treatments: Some patients benefit from touch-ups every 6–12 months.

    Many dermatologists also recommend combining laser therapy with microneedling or chemical peels for enhanced results, depending on skin type and scar severity.

    Real-Life Example: Success with Laser Therapy

    Take Priya, a 28-year-old professional struggling with deep acne scars on her cheeks. She underwent three sessions of fractional laser treatment spaced four weeks apart. After the first session, she noticed smoother texture and less noticeable scarring. By the final session, her skin showed dramatic improvement, boosting her confidence and eliminating the need for heavy makeup.

    Stories like Priya’s show that laser treatment for acne scars is not just about aesthetics—it’s about reclaiming confidence.

    Potential Risks and Considerations

    Laser treatment for acne scars is generally safe but carries some risks:

    • Temporary redness, swelling, or irritation
    • Changes in skin pigmentation (usually temporary)
    • Rare infections or scarring if post-care isn’t followed

    A qualified dermatologist will discuss these risks and tailor treatment settings to minimize complications.

    Choosing the Right Clinic for Laser Treatment for Acne Scars

    Not all clinics are created equal. Here’s what to look for:

    • Certified Dermatologists: Ensure the practitioner is trained in laser procedures.
    • Advanced Equipment: Modern fractional and ablative lasers produce better results with fewer side effects.
    • Personalized Treatment Plans: Scar severity varies; a one-size-fits-all approach doesn’t work.
    • Before-and-After Photos: Ask to see real patient results for reference.

    Investing in a reputable clinic ensures safety, efficacy, and long-term satisfaction.

    Cost of Laser Treatment for Acne Scars

    The cost depends on:

    • Scar severity
    • Type of laser used
    • Number of sessions required
    • Clinic location

    On average, fractional laser sessions range from $300–$700 per session, while ablative lasers may cost more due to their intensity and recovery requirements. Remember, quality results and safety are worth the investment.

    FAQ About Laser Treatment for Acne Scars

    Q1: Is laser treatment for acne scars painful?
    Most patients experience mild stinging or heat, but numbing creams and cooling devices minimize discomfort.

    Q2: How many sessions are needed?
    It depends on scar severity. Typically, 2–5 sessions spaced 4–6 weeks apart yield optimal results.

    Q3: Can laser treatment remove all acne scars?
    While laser treatment greatly improves appearance, some deep scars may need combination therapy for complete results.

    Q4: Are there any side effects?
    Temporary redness, swelling, or mild peeling is normal. Serious complications are rare when performed by a certified dermatologist.

    Conclusion: Transform Your Skin with Laser Treatment

    Acne scars don’t have to define your appearance or confidence. Laser treatment for acne scars offers a scientifically proven, effective way to smooth skin, reduce scar visibility, and stimulate natural healing. By understanding your scar type, choosing the right laser, and following proper aftercare, you can achieve clear, radiant skin.

    Whether you’re dealing with deep ice-pick scars or mild textural imperfections, laser therapy provides a reliable path to reclaiming healthy skin. Start your journey today with a consultation and discover how modern dermatology can transform your confidence as much as your skin.